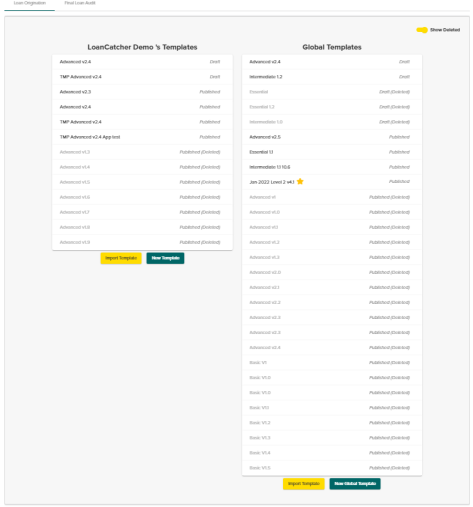
Workflow Manager
Workflow is completely customizable for each broker. The drag & drop editor allows each broker to update their workflow tasks or create a new custom workflow plan that suites their business. Brokers can base their templates on our global templates or start fresh with a new template. LoanCatcher℠’s existing workflow is the default.
During the LoanCatcher℠ on-boarding process, an entity selects which Workflow template to use. However, this can be changed by any person with a Workflow Manager role.
Review the Workflow Introduction and other related Workflow videos in the Resources & Videos section for additional information.
Click Workflow Management under Configuration in the left navigation menu. Only users with a Workflow Manager role have access to this option.
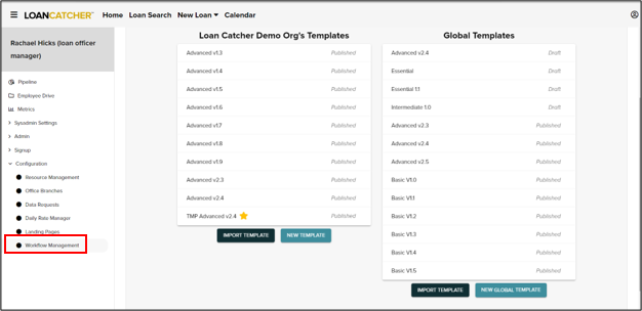
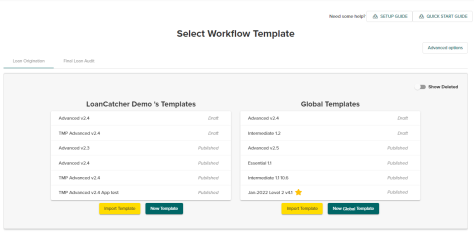
The Workflow Management page displays two columns. The left side is the entity specific workflow. The entity’s custom flow is created in this column and it is only visible to that entity. The right side contains the Global Templates which, are templates that all LoanCatcher℠ users have access
There are Workflow Templates for both Loan Origination and Final Loan Audit. Toggle between the two tabs as needed.
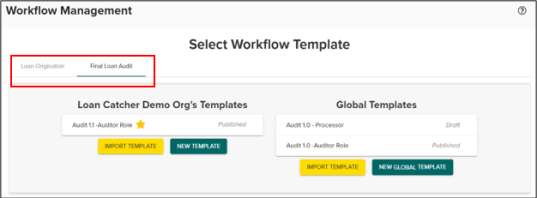
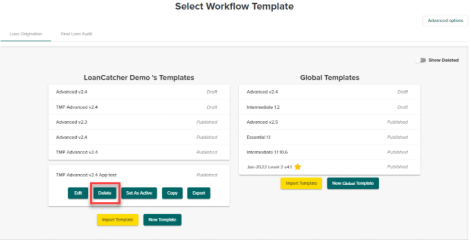
Click a template to expand it for additional options.
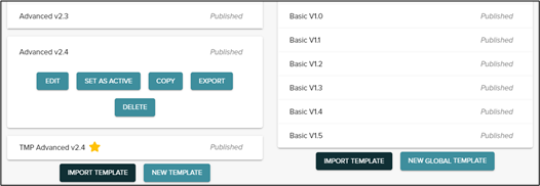
Option Descriptions
-
Edit: Review and/or edit the Workflow.
-
Set As Active: Designates that template to be used as the default workflow template for newly created loans.
-
Copy: Creates a copy of an existing workflow template. Can select to copy as an entity or global template. Template begins in draft mode.
-
Export: Exports downloaded as a JSON file.
-
Delete: Archives the workflow template.
Global templates fall into one of three categories:
-
Essential: The most basic workflow template with a small, focused list of essential tasks.
-
Intermediate: A moderately sized workflow template.
-
Advanced: A comprehensive workflow template with the highest number of tasks to address.
Click either New Template or New Global Template. Alternatively, click Import Template to import a JSON file
Click EDIT.
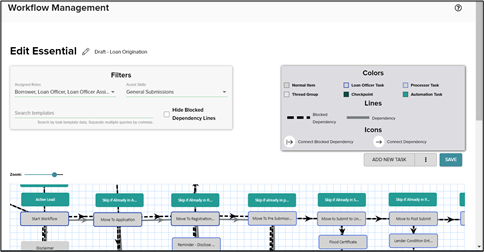
The template name, status and type are displayed in the upper left corner
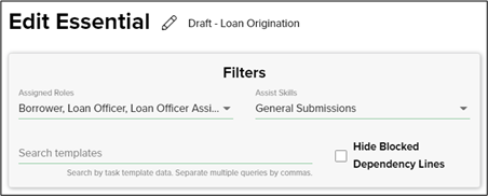
Click the
![]() icon to edit the template name.
icon to edit the template name.
![]()
Filter by Assigned Roles or Assist Skill to narrow the results. Alternatively, enter one or more words into Search Templates to search for specific tasks. For example, enter Flood to search for any task containing the word flood.
![]()
A key is shown in the top right of the page.
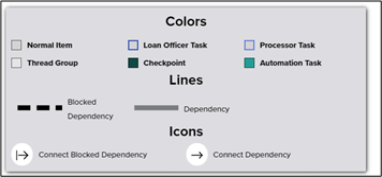
Normal Item
Task (upload, confirm, free text) that is assigned to any individual other than Loan Officer or Processor.
Example:

Thread Group
Group of related workflow tasks that can be edited as a single group. Displays as a light grey box with all workflow items related to it listed together.
Example: 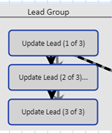
Loan Officer Task
Tasks assigned to the Loan Officer.
Example: 
Processor Task
Tasks assigned to the Processor.
Example:

Checkpoint
The task ties to a checkpoint on the Loan Center.
Example: 
Automation Task
Triggers an automation when this task is available.
Example:

Blocked Dependency
Task must have the prior item completed before it is available in be worked on.
Example:

Dependency
Task can be completed prior to the item before but will be located under Work Ahead.
Example: 
Connect Blocked Dependency
Indicates tasks connected via blocked dependency.
Example:

Connect Dependency
Indicates tasks connected via dependency.
Example:

Drag the Zoom slider to enlarge or shrink the size of the workflow.
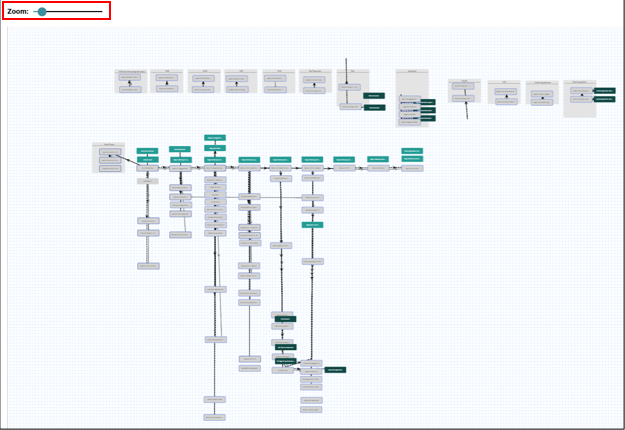
Click and drag to move the workflow to the desired location within the workflow template.
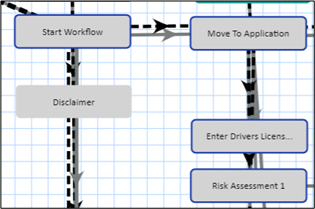
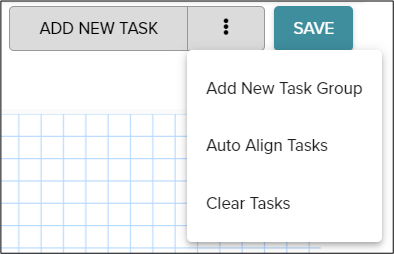
Additional options are located directly under the key.

Click the
![]() icon
to expand the selection list.
icon
to expand the selection list.
Option Descriptions
-
Add New Task: Opens the Edit Task dialog to create a new task.
-
Add New Task Group: Creates a task group connecting individual related task. This allows group action(s) to be applied such as reassigning task to another user or canceling an order with one. Existing task groups are Lead, Title and Appraisal.
-
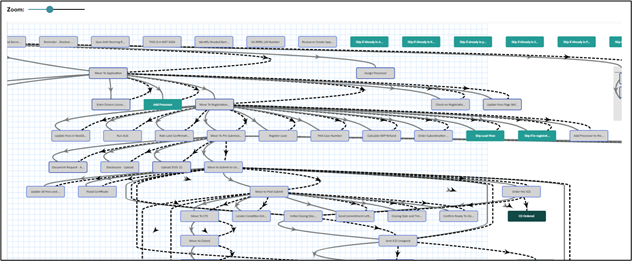
Auto Align Tasks: Aligns the tasks in as much of a straight line as possible.
-
Example of a workflow after Auto Align has been applied:
-
-
Clear Tasks: Clears all tasks from the template. A confirmation dialog appears prior to any deletion.
Whether starting from a blank new template or using an existing global template, drag, connect, and add new custom workflow tasks. Workflow tasks have a wide range of flexibility from confirming information to auto adding role carriers to a loan.
Click ADD NEW TASK.
Result: A blank Edit Task window appears.
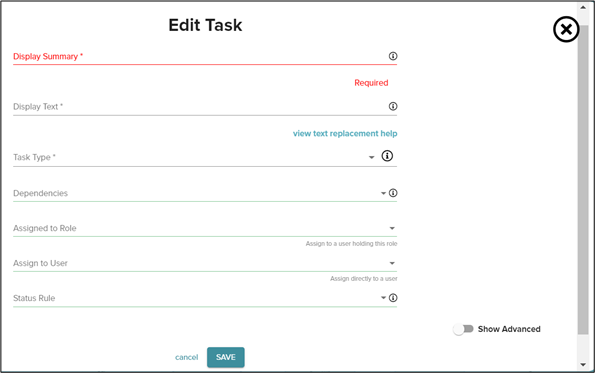
Click the
![]() icon next to
a field to view helpful information about the field.
icon next to
a field to view helpful information about the field.

The Edit Task box contains 7 fields:
-
Display Summary: Enter the task heading.
-
Display Text: Enter the task message.
-
Task Type: Select the appropriate type from the drop down list. Refer to Task Types below for details.
-
Dependencies: Select the appropriate dependency from the drop down list. The task shows as work ahead until the entered dependency is completed.
-
Assigned to Role: Select a role from drop down list. Options include all entity set roles.
-
Assigned to User: Select a specific user from drop down list. Options include all active entity users.
-
Status Rule: Select a rule from drop down list. This determines when a task can be marked as complete.
Task Types
-
Automation: Triggers an automation when this task is available. For example, skip lead flow if file is moved to Registration status.
-
Checkpoint: Ties to a checkpoint on the Loan Center. For example, upload the signed initial Closing Disclosure.
-
Confirmation: Displays a Confirm button. Click Confirm when the task is complete to mark the task as Done. For example, enter applicable contact details into the Contacts.
-
File Upload: Requires a document to be uploaded. For example, save a copy of the Flood Certificate in the Documents page.
-
Free Text: Allows a written response. For example, provide an explanation regarding employment gap between February – April, 2020.
-
Custom Work Component: Custom pre-built forms. For example, enter the Driver’s License number and expiration date.
Toggle Show Advanced on to access additional fields.
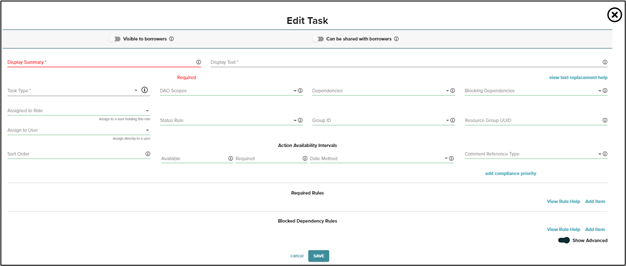
Click SAVE to save the task.
Click directly on a task to displays options along with a task preview containing the Display Summary, Display Text and Assigned Roles.
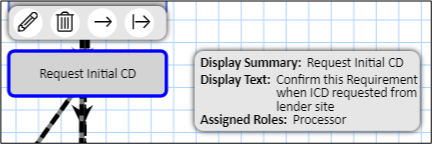
![]() Opens the Edit Task box
where changes can be applied and saved.
Opens the Edit Task box
where changes can be applied and saved.
![]() Deletes the task. A
confirmation dialog opens before task deletion.
Deletes the task. A
confirmation dialog opens before task deletion.
![]() Allows tasks to be
connected via dependency.
Allows tasks to be
connected via dependency.
![]() Allows tasks to be
connected via blocked dependency.
Allows tasks to be
connected via blocked dependency.
Create Dependency
Click the initiating task.
Click the appropriate icon for your purpose.
Result: A linking arrow appears.

Click the second task.
Result: The dependency is created.

Delete Dependency
Click on the arrowhead.
Result: A delete icon appears.

Click the Delete icon.
Result: The link between two tasks is removed.

Click SAVE regularly when editing a workflow template to ensure progress is saved.
The Update Essential dialog opens. Indicate whether the template should be published or not. Publish a template to make it available for use on loans. Templates remain drafts until Yes is selected. Click CONFIRM.

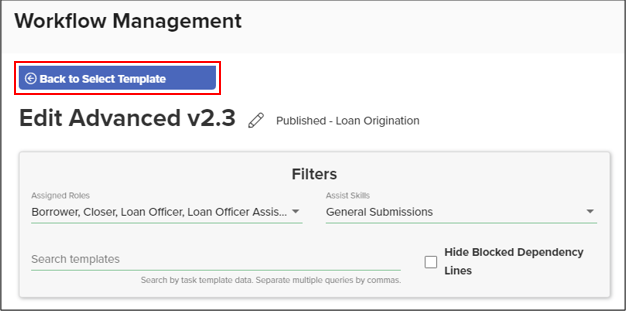
In the upper left corner, click Back to Select Template to return the Select Workflow Template list.
LoanCatcher℠ offers one-on-one support to discuss the design and implementation of your custom workflow.
The Workflow Management screen provides an option to Delete Templates.
Click on the individual templates to access the Delete option.
The templates are archived and hidden. A Show Deleted toggle is available to review all templates.
